Portfolio, photos and bio
Food Photography Tips for Chefs: How to Photograph Food With a Phone
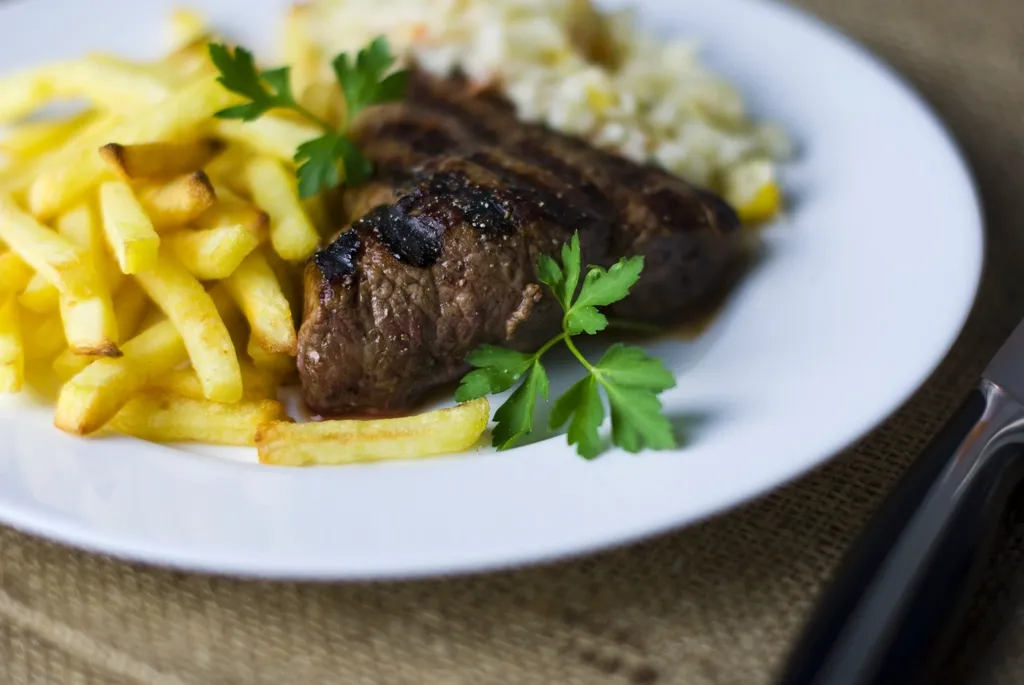
To photograph food well, use soft window light, shoot at an angle that matches the dish, keep the background and props simple, and edit lightly. A current phone is all the camera you need for a portfolio, a menu, or Instagram.
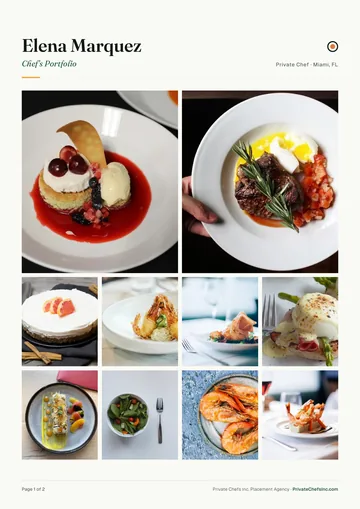
This guide is written for working chefs who plate dozens of dishes a night and have two minutes to shoot one. It covers light, angles, backgrounds, plating for the camera, phone settings, consistency across a set, and a checklist you can run on the pass. Good photos feed straight into your free chef portfolio builder, where they become a PDF you can send with applications and client inquiries.
Food photography lighting: use a window, not the kitchen
Light matters more than the camera. Kitchen lighting is built for visibility, not flattery, and it ruins color.
- Find a window. Place the plate on a table next to a window, ideally with the light coming from the side or slightly behind the dish. Side light shows texture and shape; flat front light makes food look dull.
- Soften it. Direct sun creates harsh shadows and blown highlights. Hang a thin white curtain, a sheet of parchment, or a diffuser over the window. On cloudy days you do not need any of this.
- Turn off overhead lights. Mixed light sources create color casts. Warm yellow kitchen bulbs next to cool daylight make skin-tone-like orange patches on white plates.
- Use a white card as a reflector. A folded sheet of white foam core on the shadow side lifts the dark areas. Silver foil on cardboard works in a pinch.
- Avoid the flash. It flattens food and bounces off glaze and sauce. If you must shoot at night, use a continuous LED panel with a diffuser.
- Shoot early or late. If your restaurant has no daylight at the pass, shoot staff meals or specials in the dining room at lunch, before service.
Angles: which dishes suit which view
One angle does not fit every dish. Pick based on the shape of the food and what you want the viewer to notice.
| Angle | Best for | Why it works |
|---|---|---|
| Overhead (90 degrees) | Flat plates: pizza, salads, bowls, tartines, spreads, tasting boards | Shows composition and color, and makes a graphic image |
| 45 degrees | Most plated dishes: pasta, mains, entrees with a protein and sides | Matches how a diner sees the plate, with depth and texture |
| Eye level (0 to 20 degrees) | Tall or layered food: burgers, stacked desserts, cakes, drinks, sandwiches | Shows height and layers |
| Close-up detail | Texture shots: crust, sauce pour, cut-through, glaze | Makes the food look craveable |
For a portfolio, shoot each hero dish at two angles, usually 45 degrees and overhead, then choose the better. Keep the camera at the same distance for similar dishes so your set looks like it belongs together.
Leave space around the plate. Shoot a little wider than you think, because you can crop in later but you cannot add pixels you did not capture.
How to photograph food: plating for the camera
A plate that works on the pass may not work in a photo. Camera plating is a few small adjustments.
- Clean the rim. Wipe fingerprints and sauce drips with a damp towel. The camera sees every smear.
- Plate slightly generously. Add extra garnish to the front where the camera sees it, and use odd numbers (three scallops, five asparagus).
- Add height. Stack, lean, and layer. A flat pile on a flat plate looks flat in a photo.
- Contrast the food with the plate. White plates for colorful food; dark or matte plates for pale food like risotto, pasta, or fish.
- Show a cut or a pour. Cut a steak, tear a loaf, spoon sauce, and shoot the moment. Motion implies freshness.
- Add a bit of gloss. A light brush of oil or a fresh herb sprig refreshes dishes that dulled while you set up. Shoot hot food within 60 to 90 seconds.
- Use a stand-in. Set the lights and framing with a spare plate, then bring out the real dish and shoot quickly.
Food photography backdrops and surfaces
The background should support the dish, not compete with it. Pick a few reliable surfaces and use them across your whole portfolio.
- Wood. Warm, forgiving, and good for rustic food, bread, and roasts. Use a mid-tone, not shiny.
- Dark slate or matte black. Moody and high contrast. Great for pale or colorful food, and for fine dining.
- White or light marble. Clean and bright. Good for desserts and salads, but watch for glare and overexposure.
- Concrete or plaster look. A neutral gray surface hides stains and suits modern plates.
- Linen or paper. Wrinkled linen adds softness; plain kraft or butcher paper works as a quick backdrop.
Low-cost options: tile samples from a hardware store, painted plywood boards (two-sided, light and dark), and large sheets of poster board. Avoid patterned tablecloths, shiny surfaces, and anything that has a brand on it.
Food photography props: less is better
Props tell a story but also steal attention. Use a few and keep them in the same family of color.
- Utensils. One fork or spoon placed at an angle. Avoid shiny silver that bounces light; matte or brass is easier.
- Napkins and cloths. A single linen napkin tucked under the plate adds depth.
- Ingredients. A few raw ingredients near the dish (lemons for a citrus dessert, herbs next to a pasta) explain the flavor.
- Hands. A hand pouring or reaching adds life, but keep nails clean and sleeves tidy.
- Glassware and ceramics. Handmade plates and bowls look better than glossy white plates, and make a set feel curated.
- Rule of three. No more than three props in the frame, and none that overlap the hero of the shot.
Phone settings that make a difference
You do not need a new phone. You need five settings.
- Turn on gridlines. Use the rule of thirds to place the plate off center, and keep the horizon straight.
- Tap to focus, then lock exposure. Press and hold on the food until AE/AF lock appears, then slide the exposure down slightly. Food photographed too bright loses texture and color.
- Do not use digital zoom. It reduces quality. Move closer instead, or use the 2x lens if your phone has one.
- Portrait mode with caution. It can blur edges of plates, utensils, and garnishes in odd ways. If you use it, check the edges, or skip it and use natural depth by moving close.
- Clean the lens. Kitchen grease on the lens creates a hazy photo. Wipe it with a soft cloth before every shoot.
Also shoot in the highest resolution available, hold the phone steady against a surface or use a small tripod, and turn off any filters on the camera. Apply edits later.
Consistency across a set and food photography ideas
For a portfolio, ten consistent photos beat thirty random ones. A viewer should be able to see that the same chef shot all of them.
- Same light direction. Do not mix left-lit and right-lit photos in one page.
- Same angle family. Pick overhead plus 45 degrees, and stay with it.
- Same color palette. Two backdrops and a handful of plates.
- Same edit. Use one preset or set of edits for the whole set.
- Same crop ratio. Square or 4:5, not a mixture.
Food photography ideas that work for chefs:
- The hero plate on the pass, then the same dish half-eaten, for a lived-in feel.
- A process shot: dough being shaped, a sauce being finished, a pan sear.
- A tasting menu in sequence, one dish per frame, same angle.
- A tight shot of texture: crust, char, glaze, crumb.
- The station mid-service, from your side of the line.
- Seasonal ingredients next to the finished dish.
For examples of how finished photos work in a portfolio layout, browse our culinary portfolio examples.
Editing basics and a shot checklist
Edit lightly. Your job is to make the photo look like the food looked in person, not to repaint it.
- Crop and straighten first.
- Exposure: brighten slightly if the plate looks dim, but protect highlights on white plates.
- White balance: adjust until white plates look white, not yellow or blue.
- Contrast and texture: small boosts to bring out crust and char.
- Saturation: keep it under control. Over-saturated food looks fake and spoils trust.
- Remove distractions: spot-heal crumbs, specks, and stray hairs.
Free apps like Snapseed, Lightroom Mobile, or the built-in photos editor are enough.
One-minute checklist
- Window light, overhead lights off.
- Clean plate rim, correct plate color.
- Backdrop chosen, three props or fewer.
- Angle chosen for the dish (overhead, 45 degrees, eye level).
- Lens wiped, gridlines on, exposure locked.
- Shoot 10 to 15 frames, vary the angle slightly.
- Pick the best one, crop, light edit.
- Add it to your chef portfolio with a one-line caption.
Photos also anchor your written profile. Pair them with a short bio (see these chef bio examples), and if you cook for private clients, the portfolio advice in how to become a personal chef shows how to use them.
Food photography tips FAQ
What is the best light for food photography?
Soft natural window light is best. Place the plate beside a window with light coming from the side or slightly behind, diffuse direct sun with a thin white curtain or parchment, turn off overhead and yellow lights, and use a white card to bounce light into the shadows.
What is the best angle for food photography?
It depends on the dish. Overhead suits flat food like pizza, salads, and bowls. A 45 degree angle works for most plated dishes. Eye level suits tall food such as burgers, layered desserts, and cakes. For a portfolio, shoot two angles per dish and choose the better one.
Can I take good food photos with a phone?
Yes. Current phones are more than enough for portfolios, menus, and social media. Use window light, clean the lens, turn on gridlines, lock exposure, avoid digital zoom, and edit lightly. Good light and plating matter far more than the camera.
What backdrops should I use for food photography?
Start with three: a mid-tone wood surface, a dark matte slate or board, and a light neutral board or marble. Avoid patterns, shiny surfaces, and logos. Painted plywood boards and tile samples are cheap and work well.
How many props should I use?
Use up to three, in a matching color family, and keep them from overlapping the main dish. A fork, a linen napkin, and one or two raw ingredients are enough. Props should explain the dish, not compete with it.
How do I make my food photos look consistent?
Use the same light direction, the same two or three backdrops, a consistent angle family, the same crop ratio, and one edit preset across the whole set. Consistency makes a portfolio look intentional and professional.
Keep reading
More guides for chefs.
 Portfolio, photos and bioCulinary portfolio examples: 5 structures, photo rules and what to leave out
 Portfolio, photos and bioChef bio examples: 6 samples and a formula you can fill in
 RésumésChef resume: examples, template and skills that get interviews
 RésumésExecutive chef resume: example, summary formulas and bullet bank
Put it on paper
in three minutes.
Free, in your browser. No account, no watermark.
Build my portfolio free